-
Terraform Study 2주차 도전 과제Terraform 2023. 7. 15. 16:34
중요 개념
Terraform에서 Resource block을 loop 시키는 방법에는 count, for_each, for문을 사용할 수 있다. 이 함수들 중 count의 사용법이 쉬운 편이지만 list를 사용하는 함수이기에 주의가 필요하다. list의 경우 단순 숫자로 계산되기 때문에 변수 선언을 [1,2,3]으로 선언하고 Resource 생성 후 변수의 값을 [1,3]으로 바꾸었을 때 2,3에 해당하는 Resource가 삭제되고 3에 해당하는 Resource가 새로 생성된다. 단순 2의 값만 삭제했음에도 불구하고 순서로 판단되기 때문에 이런 일이 발생하게 된다. 때문에 map type을 사용해 for_each를 사용하는 방안이 좋으며 list로 선언했다면 for문을 사용해 map으로 변수 type을 변경할 수 있다.
1. 리전 내에서 사용 가능한 가용영역 목록 가져오기를 사용한 VPC 리소스 생성 실습 진행
main.tf
data "aws_availability_zones" "az" {
  state = "available"
}


resource "aws_vpc" "vpc" {
  cidr_block = "10.0.0.0/16"

  tags = {
    Name = "terraform-vpc"
  }
}

resource "aws_subnet" "pub_a" {
  vpc_id            = aws_vpc.vpc.id
  availability_zone = data.aws_availability_zones.az.names[0]
  cidr_block        = "10.0.0.0/24"
}
코드 설명
data block를 사용해 현재 리전에서 사용 가능한 az들을 list형태로 받아온다.
{
  "all_availability_zones" = tobool(null)
  "exclude_names" = toset(null) /* of string */
  "exclude_zone_ids" = toset(null) /* of string */
  "filter" = toset(null) /* of object */
  "group_names" = toset([
    "ap-northeast-2",
  ])
  "id" = "ap-northeast-2"
  "names" = tolist([
    "ap-northeast-2a",
    "ap-northeast-2b",
    "ap-northeast-2c",
    "ap-northeast-2d",
  ])
  "state" = "available"
  "timeouts" = null /* object */
  "zone_ids" = tolist([
    "apne2-az1",
    "apne2-az2",
    "apne2-az3",
    "apne2-az4",
  ])
}
data를 확인하면 위와 같은 정보를 받아오는 것을 확인할 수 있다.
az의 names중 첫 번째인 "ap-northeast-2a"에 10.0.0.0/24의 서브넷을 생성2. 위 3개 코드 파일 내용에 리소스의 이름(myvpc, mysubnet1 등)을 반드시! 꼭! 자신의 닉네임으로 변경해서 배포 실습해 보세요!
vpc.tf
data "aws_availability_zones" "az" {
  state = "available"
}


resource "aws_vpc" "clown_vpc" {
  cidr_block           = "10.0.0.0/16"
  enable_dns_support   = true
  enable_dns_hostnames = true

  tags = {
    Name = "t102-study"
  }
}

resource "aws_subnet" "pub_a" {
  vpc_id            = aws_vpc.clown_vpc.id
  availability_zone = data.aws_availability_zones.az.names[0]
  cidr_block        = "10.0.0.0/24"

  tags = {
    Name = "t102-subnet1"
  }
}

resource "aws_subnet" "pub_c" {
  vpc_id            = aws_vpc.clown_vpc.id
  availability_zone = data.aws_availability_zones.az.names[2]
  cidr_block        = "10.0.1.0/24"

  tags = {
    Name = "t102-subnet1"
  }
}

resource "aws_internet_gateway" "clown_igw" {
  vpc_id = aws_vpc.clown_vpc.id

  tags = {
    Name = "t102-igw"
  }
}

resource "aws_route_table" "clown_rt" {
  vpc_id = aws_vpc.clown_vpc.id

  tags = {
    Name = "t102-rt"
  }
}

resource "aws_route_table_association" "myrtassociation1" {
  subnet_id      = aws_subnet.pub_a.id
  route_table_id = aws_route_table.clown_rt.id
}

resource "aws_route_table_association" "myrtassociation2" {
  subnet_id      = aws_subnet.pub_c.id
  route_table_id = aws_route_table.clown_rt.id
}

resource "aws_route" "mydefaultroute" {
  route_table_id         = aws_route_table.clown_rt.id
  destination_cidr_block = "0.0.0.0/0"
  gateway_id             = aws_internet_gateway.clown_igw.id
}

output "aws_vpc_id" {
  value = aws_vpc.clown_vpc.id
}
ec2.tf
data "aws_ami" "amazonlinux2" {
  most_recent = true
  filter {
    name   = "owner-alias"
    values = ["amazon"]
  }

  filter {
    name   = "name"
    values = ["amzn2-ami-hvm-*-x86_64-ebs"]
  }

  owners = ["amazon"]
}

resource "aws_instance" "clown_ec2" {

  depends_on = [
    aws_internet_gateway.clown_igw
  ]

  ami                         = data.aws_ami.amazonlinux2.id
  associate_public_ip_address = true
  instance_type               = "t2.micro"
  vpc_security_group_ids      = ["${aws_security_group.clown_sg.id}"]
  subnet_id                   = aws_subnet.pub_a.id
  key_name                    = "aws-key"

  user_data = <<-EOF
              #!/bin/bash
              wget https://busybox.net/downloads/binaries/1.31.0-defconfig-multiarch-musl/busybox-x86_64
              mv busybox-x86_64 busybox
              chmod +x busybox
              RZAZ=$(curl http://169.254.169.254/latest/meta-data/placement/availability-zone-id)
              IID=$(curl 169.254.169.254/latest/meta-data/instance-id)
              LIP=$(curl 169.254.169.254/latest/meta-data/local-ipv4)
              echo "<h1>RegionAz($RZAZ) : Instance ID($IID) : Private IP($LIP) : Web Server</h1>" > index.html
              nohup ./busybox httpd -f -p 80 &
              EOF

  user_data_replace_on_change = true

  tags = {
    Name = "t102-clown_ec2"
  }
}

output "clown_ec2_public_ip" {
  value       = aws_instance.clown_ec2.public_ip
  description = "The public IP of the Instance"
}
sg.tf
resource "aws_security_group" "clown_sg" {
  vpc_id      = aws_vpc.clown_vpc.id
  name        = "T102 SG"
  description = "T102 Study SG"
}

resource "aws_security_group_rule" "clown_sginbound" {
  type              = "ingress"
  from_port         = 80
  to_port           = 80
  protocol          = "tcp"
  cidr_blocks       = ["0.0.0.0/0"]
  security_group_id = aws_security_group.clown_sg.id
}

resource "aws_security_group_rule" "clown_sgoutbound" {
  type              = "egress"
  from_port         = 0
  to_port           = 0
  protocol          = "-1"
  cidr_blocks       = ["0.0.0.0/0"]
  security_group_id = aws_security_group.clown_sg.id
}
코드 설명
- vpc.tf : Vpc, Subnets, IGW, Route table을 생성하는 파일이다. Route table의 경우 default route table을 사용해도 되지만 그럴 경우 예상치 못한 문제가 발생할 수 있기 때문에 별도의 route table을 생성해 경로추가 및 subnet을 연결
- sg.tf : ec2에 연결할 sg를 생성하는 파일로 sg rule의 경우 sg를 생성하면서 같이 정의하는 방법과 sg를 생성한 이후에 따로 등록하는 방법이 있으며 2번째 방법인 rule을 따로 등록하는 방법으로 구성, 이렇게 따로 등록하는 경우 이후의 변경사항을 적용하기 쉽고 sg의 rule만 따로 분리해서 관리할 수 있는 장점이 있습니다.
- ec2.tf : 특정 ami가 정해지지 않은 경우 ami의 id를 알기 어렵기 때문에 data 블록을 통해 amazon linux 2 ami의 정보를 가져와 ec2를 생성했으며, ec2가 정상적으로 생성되었는지 확인하기 위해 따로 console에 접근할 필요 없이 output을 통해 ec2의 public ip를 출력해 접근 테스트가 가능합니다.

3. 입력변수를 활용해서 리소스(어떤 리소스든지 상관없음)를 배포해 보고, 해당 코드를 정리해 주세요!
variables.tf
variable "instance_type" {
  #   default = "t2.micro"
}
ec2.tf
data "aws_ami" "amazonlinux2" {
  most_recent = true
  filter {
    name   = "owner-alias"
    values = ["amazon"]
  }

  filter {
    name   = "name"
    values = ["amzn2-ami-hvm-*-x86_64-ebs"]
  }

  owners = ["amazon"]
}

resource "aws_instance" "clown_ec2" {

  depends_on = [
    aws_internet_gateway.clown_igw
  ]

  ami                         = data.aws_ami.amazonlinux2.id
  associate_public_ip_address = true
  instance_type               = var.instance_type
  vpc_security_group_ids      = ["${aws_security_group.clown_sg.id}"]
  subnet_id                   = aws_subnet.pub_a.id
  key_name                    = "aws-key"

  user_data = <<-EOF
              #!/bin/bash
              wget https://busybox.net/downloads/binaries/1.31.0-defconfig-multiarch-musl/busybox-x86_64
              mv busybox-x86_64 busybox
              chmod +x busybox
              RZAZ=$(curl http://169.254.169.254/latest/meta-data/placement/availability-zone-id)
              IID=$(curl 169.254.169.254/latest/meta-data/instance-id)
              LIP=$(curl 169.254.169.254/latest/meta-data/local-ipv4)
              echo "<h1>RegionAz($RZAZ) : Instance ID($IID) : Private IP($LIP) : Web Server</h1>" > index.html
              nohup ./busybox httpd -f -p 80 &
              EOF

  user_data_replace_on_change = true

  tags = {
    Name = "t102-clown_ec2"
  }
}

output "clown_ec2_public_ip" {
  value       = aws_instance.clown_ec2.public_ip
  description = "The public IP of the Instance"
}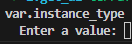
위 variables.tf의 variable 블록과 같이 변수를 선언해 사용할 수 있다. 해당 예시는 ec2 type을 변수로 변경한 코드로 받아온 변수 사용 시에는 var.<변수이름> 형태로 사용이 가능하며 해당 변수의 default value의 경우 변수에 값이 입력되지 않으면 사용되는 값이며 변수의 우선순위에 따라 다르게 적용될 수 있다.
variable block안에서 다른 variable을 참조할 수 없다!!!
4.local를 활용해서 리소스(어떤 리소스든지 상관없음)를 배포해보고, 해당 코드를 정리해주세요!
local은 해당 모듈 내에서만 사용가능한 변수로 locals block를 통해 선언할 수 있으며 block안에 다양한 type의 변수를 선언할 수 있다.
ec2.tf
locals {
  common_tags = {
    make = "terraform"
    env  = "prd"
    user = "developers"
  }
  ami_owner = ["amazon"]
}

data "aws_ami" "amazonlinux2" {
  most_recent = true
  filter {
    name   = "owner-alias"
    values = local.ami_owner
  }

  filter {
    name   = "name"
    values = ["amzn2-ami-hvm-*-x86_64-ebs"]
  }

  owners = ["amazon"]
}

resource "aws_instance" "clown_ec2" {

  depends_on = [
    aws_internet_gateway.clown_igw
  ]

  ami                         = data.aws_ami.amazonlinux2.id
  associate_public_ip_address = true
  instance_type               = var.instance_type
  vpc_security_group_ids      = ["${aws_security_group.clown_sg.id}"]
  subnet_id                   = aws_subnet.pub_a.id
  key_name                    = "aws-key"

  tags = merge({
    Name = "t102-clown_ec2"
    },
    local.common_tags
  )
}

output "clown_ec2_public_ip" {
  value       = aws_instance.clown_ec2.public_ip
  description = "The public IP of the Instance"
}
locals block을 보면 map, list형태로 변수를 선언해 사용하는 것을 볼 수 있다. locals에 선언한 값 사용 시 local.<변수이름>의 형태로 사용 가능
위 코드에서는 data block을 통해 받아오는 ami의 owner의 값과 tags값에 locals를 사용한 예시이며 tags의 경우 기존에 있던 MAP 형태의 NAME을 유지하기 위해 merge함수를 사용5. count, for_each 반복문, for문, dynamic문을 활용해서 리소스(어떤 리소스든지 상관없음)를 배포해 보고, 해당 코드를 정리해 주세요!
sg.tf
resource "aws_security_group" "sg_alb_ext" {
  vpc_id = var.vpc_id
  name = format(
    "%s%s-%s-%s",
    var.company,
    "sg-alb-ext",
    var.env,
    var.team
  )
  description = var.sg_alb_ext["description"]


  tags = merge({
    Name = format(
      "%s%s-%s-%s",
      var.company,
      "sg-alb-ext",
      var.env,
      var.team
    ),
    local.common_tags
  )

  dynamic "ingress" {
    for_each = var.sg_alb_ext["ingresses"]
    content {
      description     = lookup(ingress.value, "description", null) != null ? lookup(ingress.value, "description") : ingress.key
      from_port       = lookup(ingress.value, "from_port", 0)
      to_port         = lookup(ingress.value, "to_port", 0)
      protocol        = lookup(ingress.value, "protocol", "-1")
      cidr_blocks     = lookup(ingress.value, "cidr_blocks", null) != null ? lookup(ingress.value, "cidr_blocks") : null
      security_groups = lookup(ingress.value, "security_groups", null) != null ? lookup(ingress.value, "security_groups") : null
    }
  }

  dynamic "egress" {
    for_each = var.sg_alb_ext["egresses"]
    content {
      description = lookup(egress.value, "description", null) != null ? lookup(egress.value, "description") : egress.key
      from_port   = lookup(egress.value, "from_port", null)
      to_port     = lookup(egress.value, "to_port", null)
      protocol    = lookup(egress.value, "protocol", null)
      cidr_blocks = lookup(egress.value, "cidr_blocks", null)
    }
  }
}
variables.tf
sg_alb_ext = {
  description = "External ALB Security Group"
  ingresses = {
    "HTTP" = {
      description     = "HTTP"
      from_port       = 80
      to_port         = 80
      protocol        = "TCP"
      cidr_blocks     = ["0.0.0.0/0"]
      security_groups = null
    },
    "HTTPS" = {
      description     = "HTTP"
      from_port       = 443
      to_port         = 443
      protocol        = "TCP"
      cidr_blocks     = ["0.0.0.0/0"]
      security_groups = null
    }

  }
  egresses = {
    "ALL" = {
      from_port       = 0
      to_port         = 0
      protocol        = "-1"
      cidr_blocks     = ["0.0.0.0/0"]
      security_groups = null
    }
  }
}
dynamic block을 사용한 예제로 count, for_each, for의 경우 resource block을 loop 시키는 함수지만 dynamic은 resource 내부의 값을 loop시키는 방법이다. 위 예시에서 보면 aws_security_group block이 아닌 engress 자체를 loop 시킬 수 있다.
cidr_blocks     = lookup(ingress.value, "cidr_blocks", null) != null ? lookup(ingress.value, "cidr_blocks") : null
security_groups = lookup(ingress.value, "security_groups", null) != null ? lookup(ingress.value,"security_groups") : null
engresses에 위와 같은 코드가 있는데 security group의 경우 Inbound에 대한 제어를 IP CIDR, SG ID로 설정할 수 있으며, 동시에 값을 넣으면 오류가 발생하기 때문에 이런 조건을 분기하기 위해 삼항 연사자를 사용해 코드 작성
Study 후기
이번주 스터디를 통해 변수의 입력 우선순위에 대해 다시 확인하게 되었고, list와 map의 차이점 및 장단점을 생각할 수 있는 시간이었습니다. 평소 list가 사용하기 쉽기 때문에 list-count를 사용해 왔지만 이제부터라도 map-for_each형태로 사용하는 방법에 익숙해져야겠다.
'Terraform' 카테고리의 다른 글
Terraform Cloud 활용하기 #2 (0) 2023.08.20 Terraform Cloud 활용하기 (0) 2023.08.12 Terraform Study 4주차 (0) 2023.07.29 Terraform Study 3주차 (0) 2023.07.22